- Home
- /
- Integrations
- /
- SMS integration to LDAP...
- /
- SMS integration for Azure...
SMS integration to AD (Microsoft Entra ID - Azure Active Directory)

What is Entra ID also known as Active Directory?
Microsoft Entra ID, formerly known as Azure Active Directory (Azure AD), is a cloud-based identity and access management service from Microsoft. This service helps organizations manage and secure user access to applications and data across a modern hybrid IT infrastructure. By using Microsoft Entra ID, organizations can offer single sign-on (SSO) and multi-factor authentication to protect user identities and improve security. The integration with Microsoft Entra ID and your Active Directory (AD) makes it possible to synchronize and manage identities centrally, simplifying user management and access control. This is essential for organizations that want efficient and secure access management.
SMS with Microsoft Entra ID - Azure Active Directory
Do you currently have a large user database in your Azure Active Directory you can benefit from the integration between Azure Active Directory (henceforth AD) and SureSMS.
With the integration, you can ensure that all recipients are automatically synchronized with the users in your AD. This means that if, for example, a user is deleted in your AD because they leave the company, they are automatically removed from the user list in SureSMS. Once you've set it up, you don't have to think about it anymore. It also means that when you add users in your AD, they are automatically added to the user list in SureSMS dashboarded.
Pay attention to ....
There are a few things you should be aware of before you start creating an SMS AD integration with SureSMS.
GDPR
The first is that SureSMS must have read access to your AD. We need read access to people, groups and the relationship between them. This means that we now start processing data for you and thus, incomply with GDPR, have a data processing agreement.
You need to make a data processing agreement with SureSMS to get started.
Phone numbers
The phone numbers we need to send to must be in your AD. In order for us to send SMS to a person, we need to know their phone number. Therefore, if you don't have phone numbers in your AD, either get it or don't do an integration.
We read the phone numbers such that we first read if there is a number in the "Phonenumber" field. If it doesn't, we read in "Company phonenumbers". The last one is a list and here we take the first number we come across.
Deleting contacts
The integration is a "one-way" integration. This means that we only read from AD. We never write to AD. So, for example, if you delete a person in SureSMS, they will only come back if they are still in AD. It's always AD that has the correct data.
The price of AD integration
The price for an SMS AD integration is 99,- per month.
How to set up your AD/Entra ID integration
This section first describes how to set up AzureAD so that SureSMS can read from it. It then describes how to set up SureSMS to read and create contacts in the SureSMS address book.
Setting up Azure AD
- Login to your Azure Dashboard (https://portal.azure.com)
- Select Microsoft Entra ID

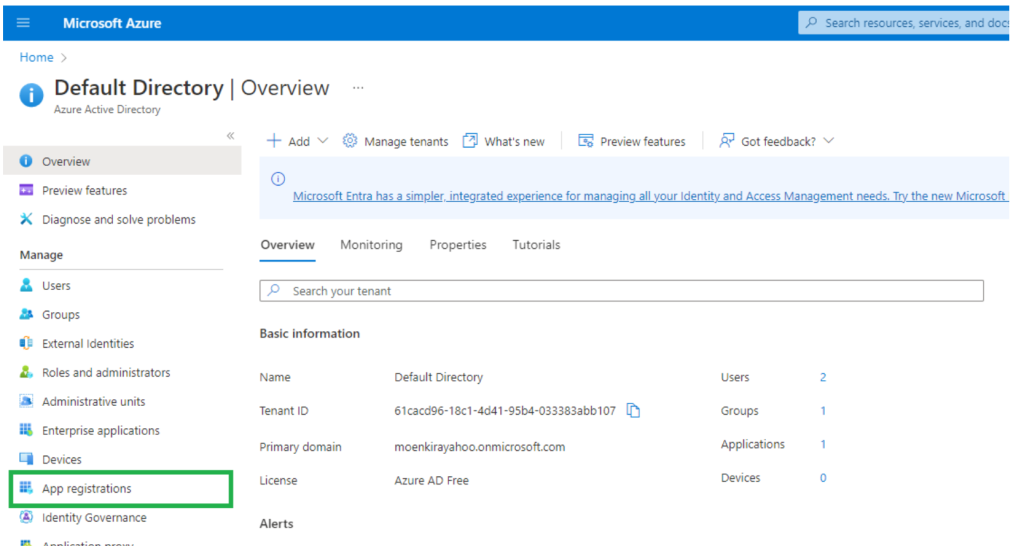
3) Click "App registration". If you do not have an application registered already, click "New registration" and give it a name and an account type. The name can for example be SureSMS.
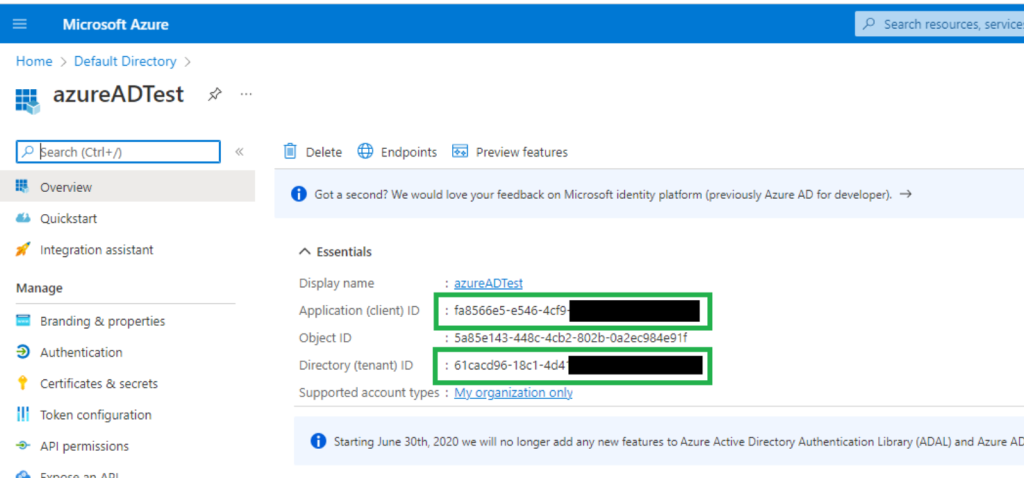
4. Now save the Application (client) Id and Directory (tenant) id.
5. From the left column, select "Certificates & Secrets" and create a new client secret for your application.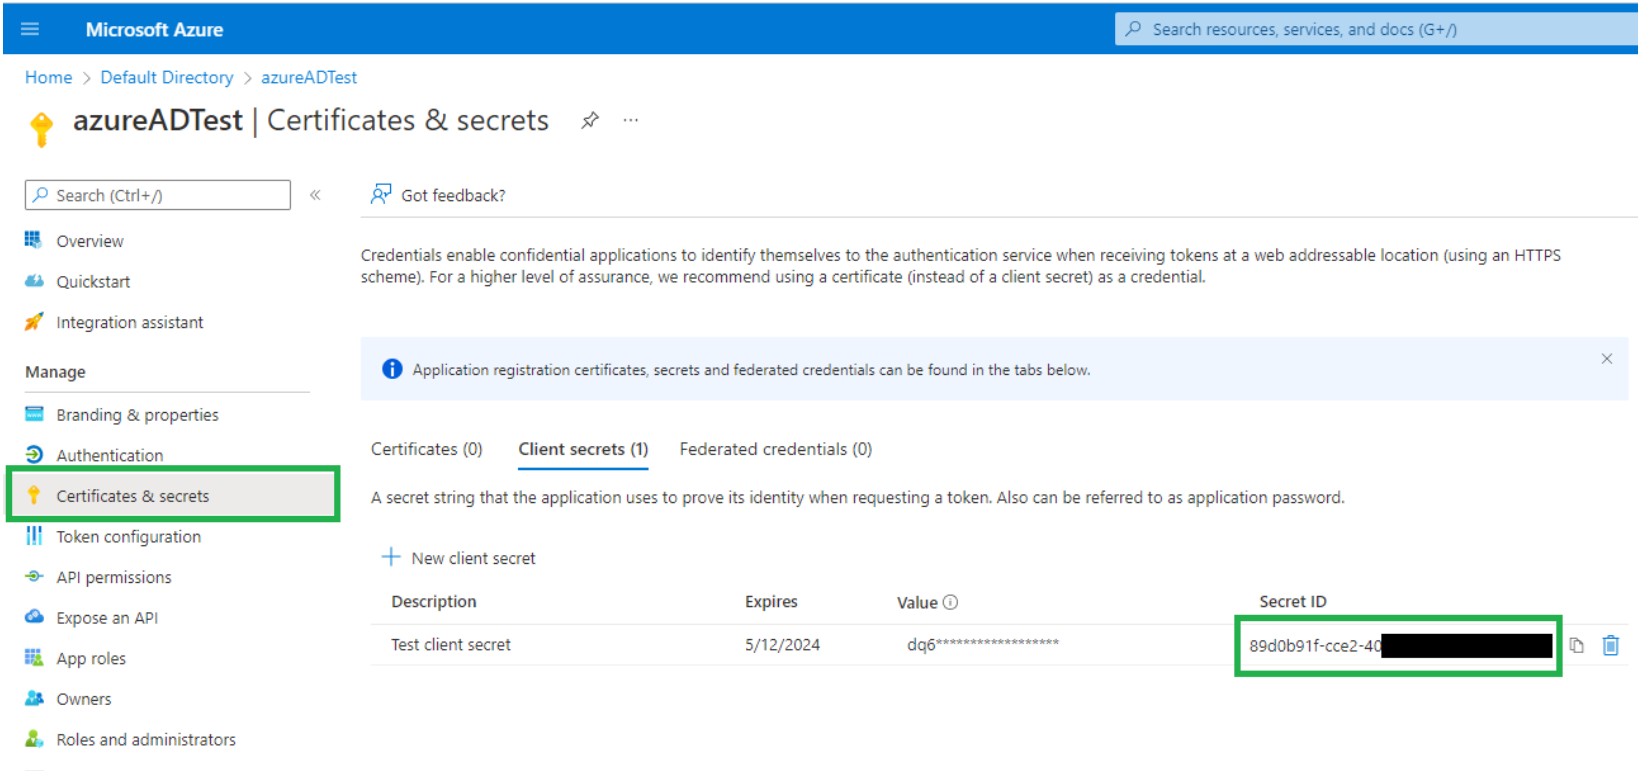
Remember to note the "Value" when you create. This value can only be read right after you have created it. It cannot be recreated. The value must be used in the "Client secret" field in the SureSMS integration.
6. To grant the new App API access, click "API Permissions" in the left column. Then click "Add a permission".
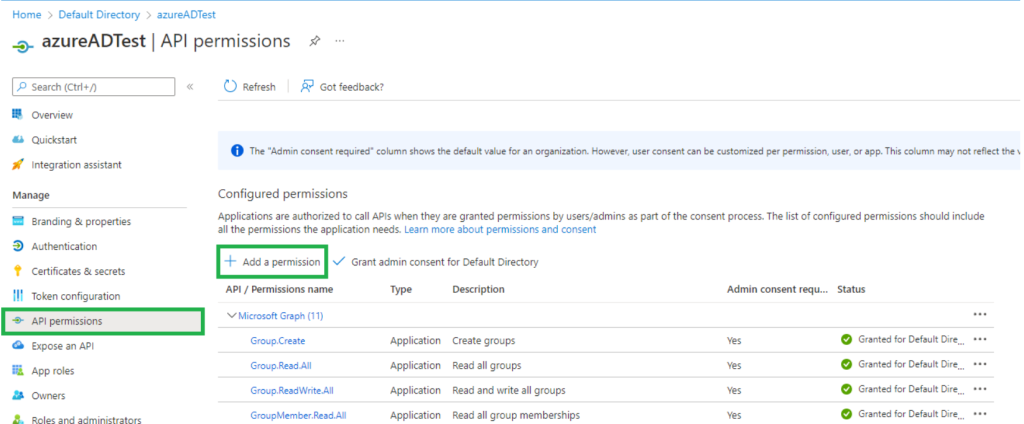
7. Select "Microsoft Graph" as the type of permission and click on "Application Permissions". The following permissions are then added:
User.Read.All
Group.Read.All
GroupMember.Read.All
8. Next, click on "Grant admin consent for the Default Directory" located just to the right of "Add a permission"
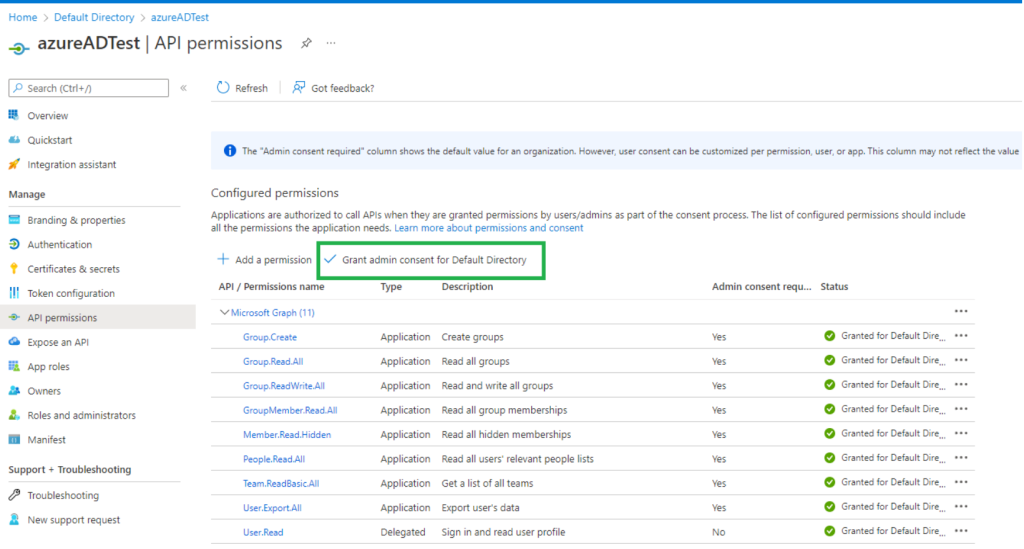
You have now finished setting up in Azure Active Directory.
Setting up SureSMS
-
- Log in to your SureSMS dashboard (https://app.suresms.com)
-
- Click Integrations on the left side
-
- Click on the "Settings" submenu
-
- Click on the "Azure AD" tab at the top of the screen
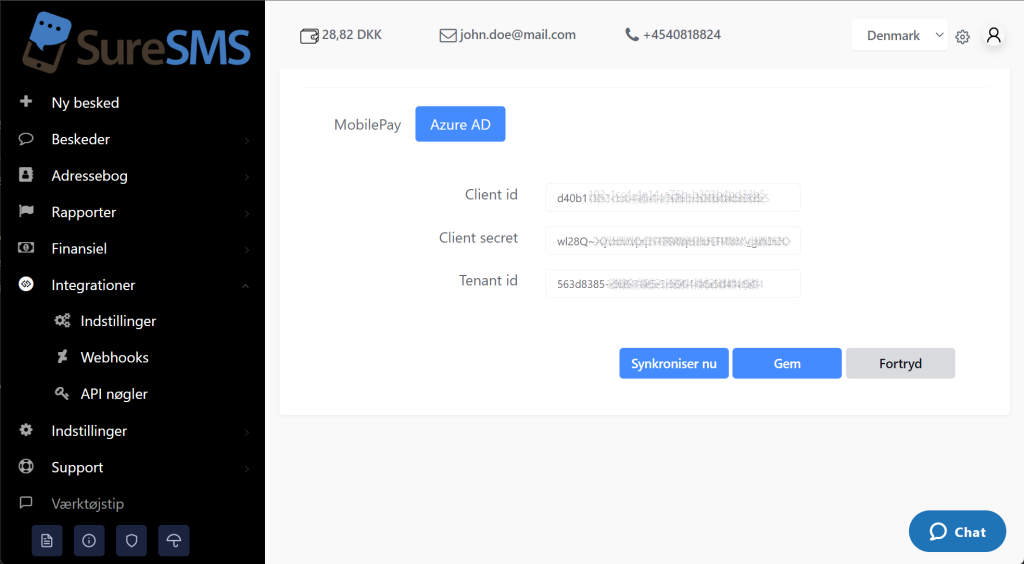
- Click on the "Azure AD" tab at the top of the screen
-
-
Fill in the information as follows
Client ID: Application (client) ID from Azure
Client secret : "Value" from Client secrets found in step 6 of the Azure Active Directory setup
Tenant id: Directory (tenant) ID6. When you click "Save" we will check if we can access Microsoft Azure Active Directory.
Now press "Synchronize now" and SureSMS will download all users from AD.
-
Get started
If you want to get started with AD integration, please contact us by filling out this form and we will contact you.
